Microsoft Teams Single Sign on with Purple Mash
![]() Updated
by
Matt Besant
Updated
by
Matt Besant
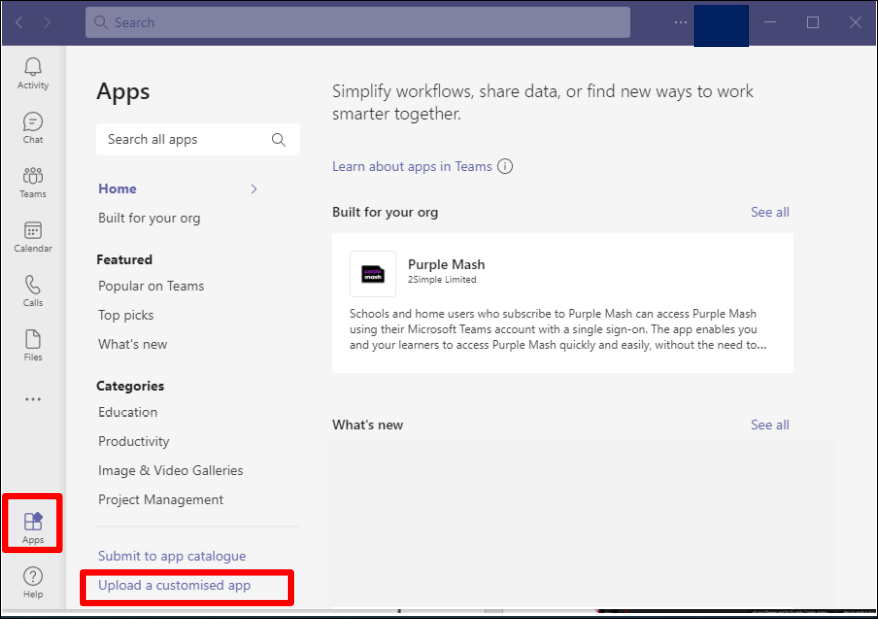
Schools and home users who subscribe to Purple Mash can access Purple Mash using their Microsoft Teams account with a single sign-on. The app enables you and your learners to access Purple Mash quickly and easily, without the need to remember and manage multiple passwords.
Pre-Setup: A school organisation using MIS Syncing
The following are steps for setting up Purple Mash accounts in readiness for the Microsoft Teams app if using MIS Syncing in Purple Mash.
- Inform support@2simple.com that you would like to use Single Sign On with Office 365.
- Make sure you’re set up to use the MIS Sync Wizard in Purple Mash. If you aren’t, then please take a look at: Can my school's MIS system automatically create my Purple Mash logins for me?
- Once you’re set up with the MIS Sync Wizard, pupils’ email addresses need to be added to their accounts. Please make sure that pupil email addresses are in your school’s MIS under Work Email Contact, so that they can be pulled onto the Purple Mash admin system.
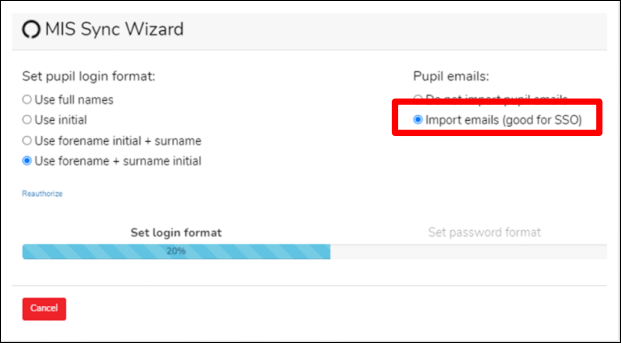
- Log in to Purple Mash and find the MIS Sync Wizard by going to Admin> Manage Users> Tools> MIS Sync Wizard.
- Run the MIS Sync Wizard – choosing the option: ‘Import emails (good for SSO).’
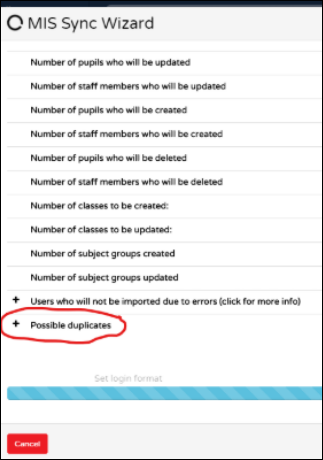
- Run though the MIS Sync Wizard and Resolve Duplicates. At the end of the sync you’ll be given a page similar to below which will ‘flag’ any duplicate users.
Pre-Setup: A school organisation not using MIS Syncing
The following are steps for setting up Purple Mash accounts in readiness for the Microsoft Teams app if not using MIS Syncing.
- Inform support@2simple.com that you would like to use Single Sign On with Office 365.
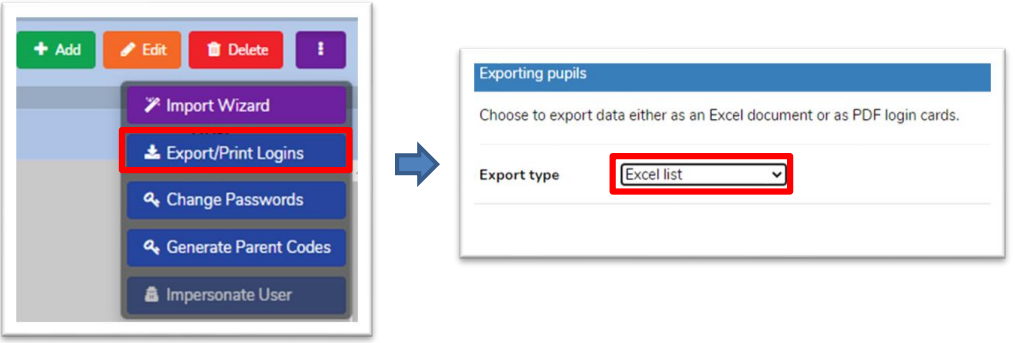
- Log in to Purple Mash and go to Admin> Manage Users, then select the Pupils Tab.
- Select all pupils by checking the checkbox at the very top.
- Choose ‘Export/Print Logins’ option in the kebab menu and select export type ‘Excel List’.
- Locate the ‘Email field’ on the Excel document and enter missing emails (Microsoft linked ones).
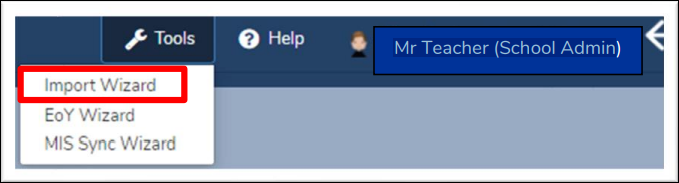
- Go back into Manage Users use the Import Wizard to update school account information.
Installing Teams App – Individual Users (Single Teacher, Home User)
The following steps are for individual users such as a teacher or other member of staff that wants the Purple Mash Teams App on their device.
- Log in to Purple Mash and then click this link to Download the zip file – or go to the teachers area of Purple Mash to download.
- Open Microsoft Teams on your device and click the Apps button, then Upload a customised app.
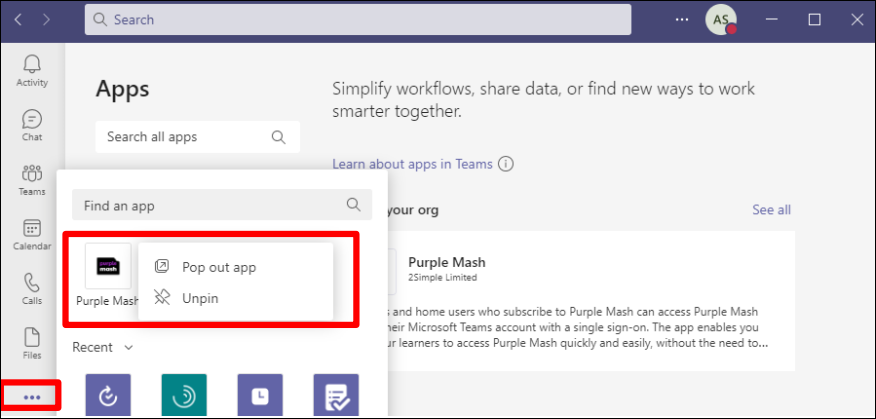
- The app might appear in the meatball menu. To pin the app at the top, right click it and select pin.
- Click on the app to start using it within teams. Resize the Teams app if you require full screen view
Installing Teams App – Administrator upload for whole organisation
The following steps are for organisation (school) administrators to install the Purple Mash Teams app across their users’ accounts.
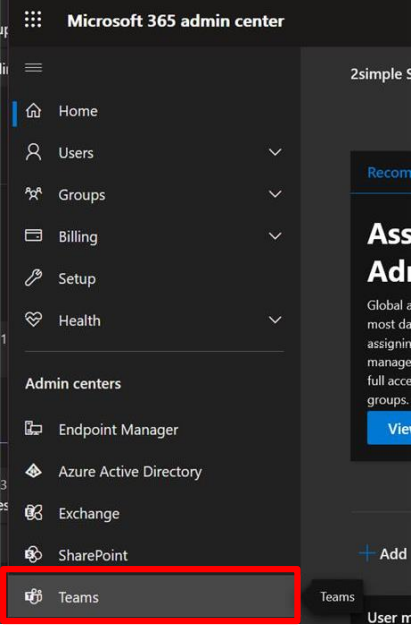
- Enter the Microsoft Teams Admin from the office 365 center.
- Go into permission policies and ensure ‘Allow specific apps and block all others’ is selected.
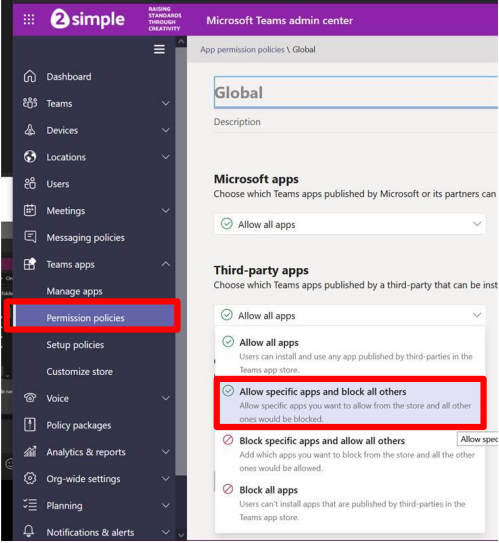
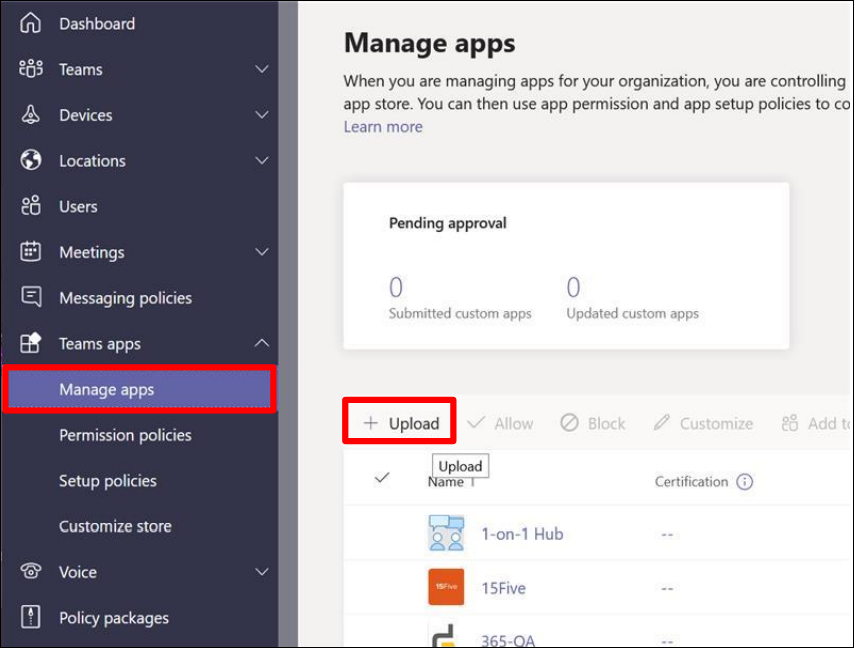
- Select Manage Apps and then Upload. Upload the Purple Mash Teams App by selecting file.
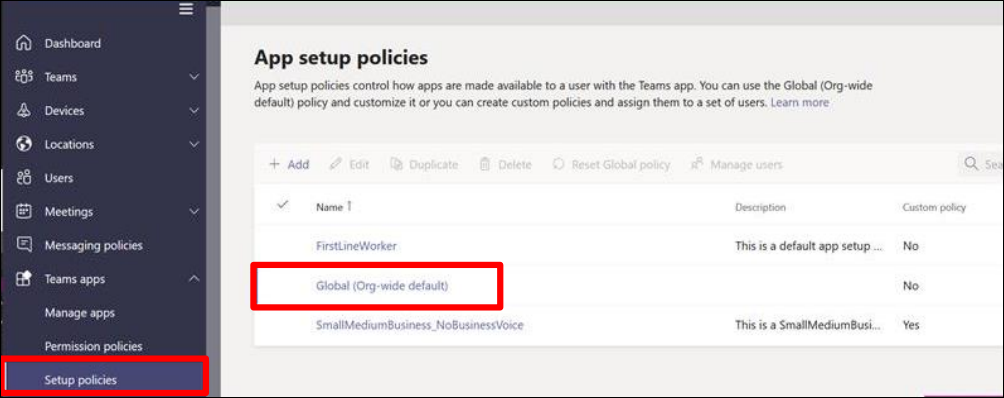
- Select Setup policies. You might choose the Global Default (Organisation Wide) or you may choose to set up a new policy for selected users if you don’t want everyone to have it.
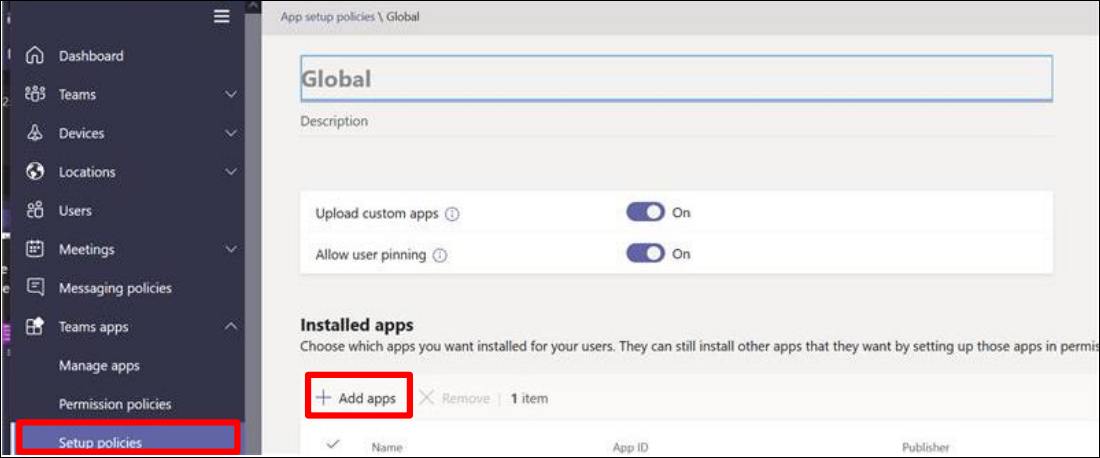
- Select ‘Add apps’ within the Setup policies section under the policy you are editing.
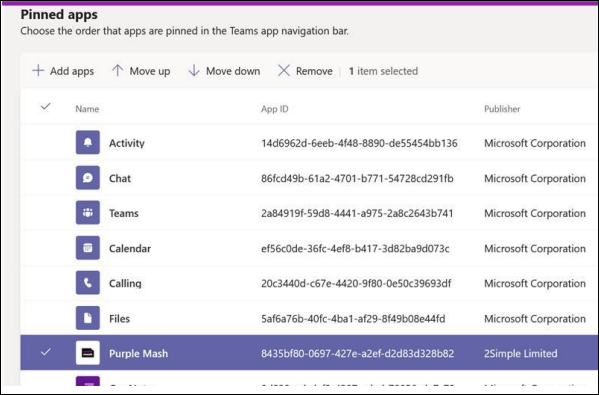
- Type Purple Mash in the search box (note the space). Click the suggested ‘Purple Mash’ and click add.
- You will now be able to move the Purple Mash App up and down the ‘Pinned Apps’ list.
Your users will now be able to access Purple Mash using their SSO Credentials.
If SSO is not working for a particular user, then please make sure their email was imported into Purple Mash by going to; Admin>Create and manage users>Pupils. Then select the pupil who is unable to log in. Ensure their email field is complete like the screen shot below.
