Transferring a HEX file to a Microbit using an iPad.
![]() Updated
by
Emily Mahony
Updated
by
Emily Mahony
You can transfer HEX files created in 2Code microbit to a physical micro:bit using an iPad. Follow the steps below to make sure the transfer works smoothly.
Using Safari
Step 1. Install the micro:bit App
Make sure the micro:bit app for iOS is installed on your iPad before you begin.
Step 2. Create and Download Your HEX File
- Open Safari on your iPad.
- Log in to Purple Mash.
- Open 2Code micro:bit and create your program.
- Save your work.
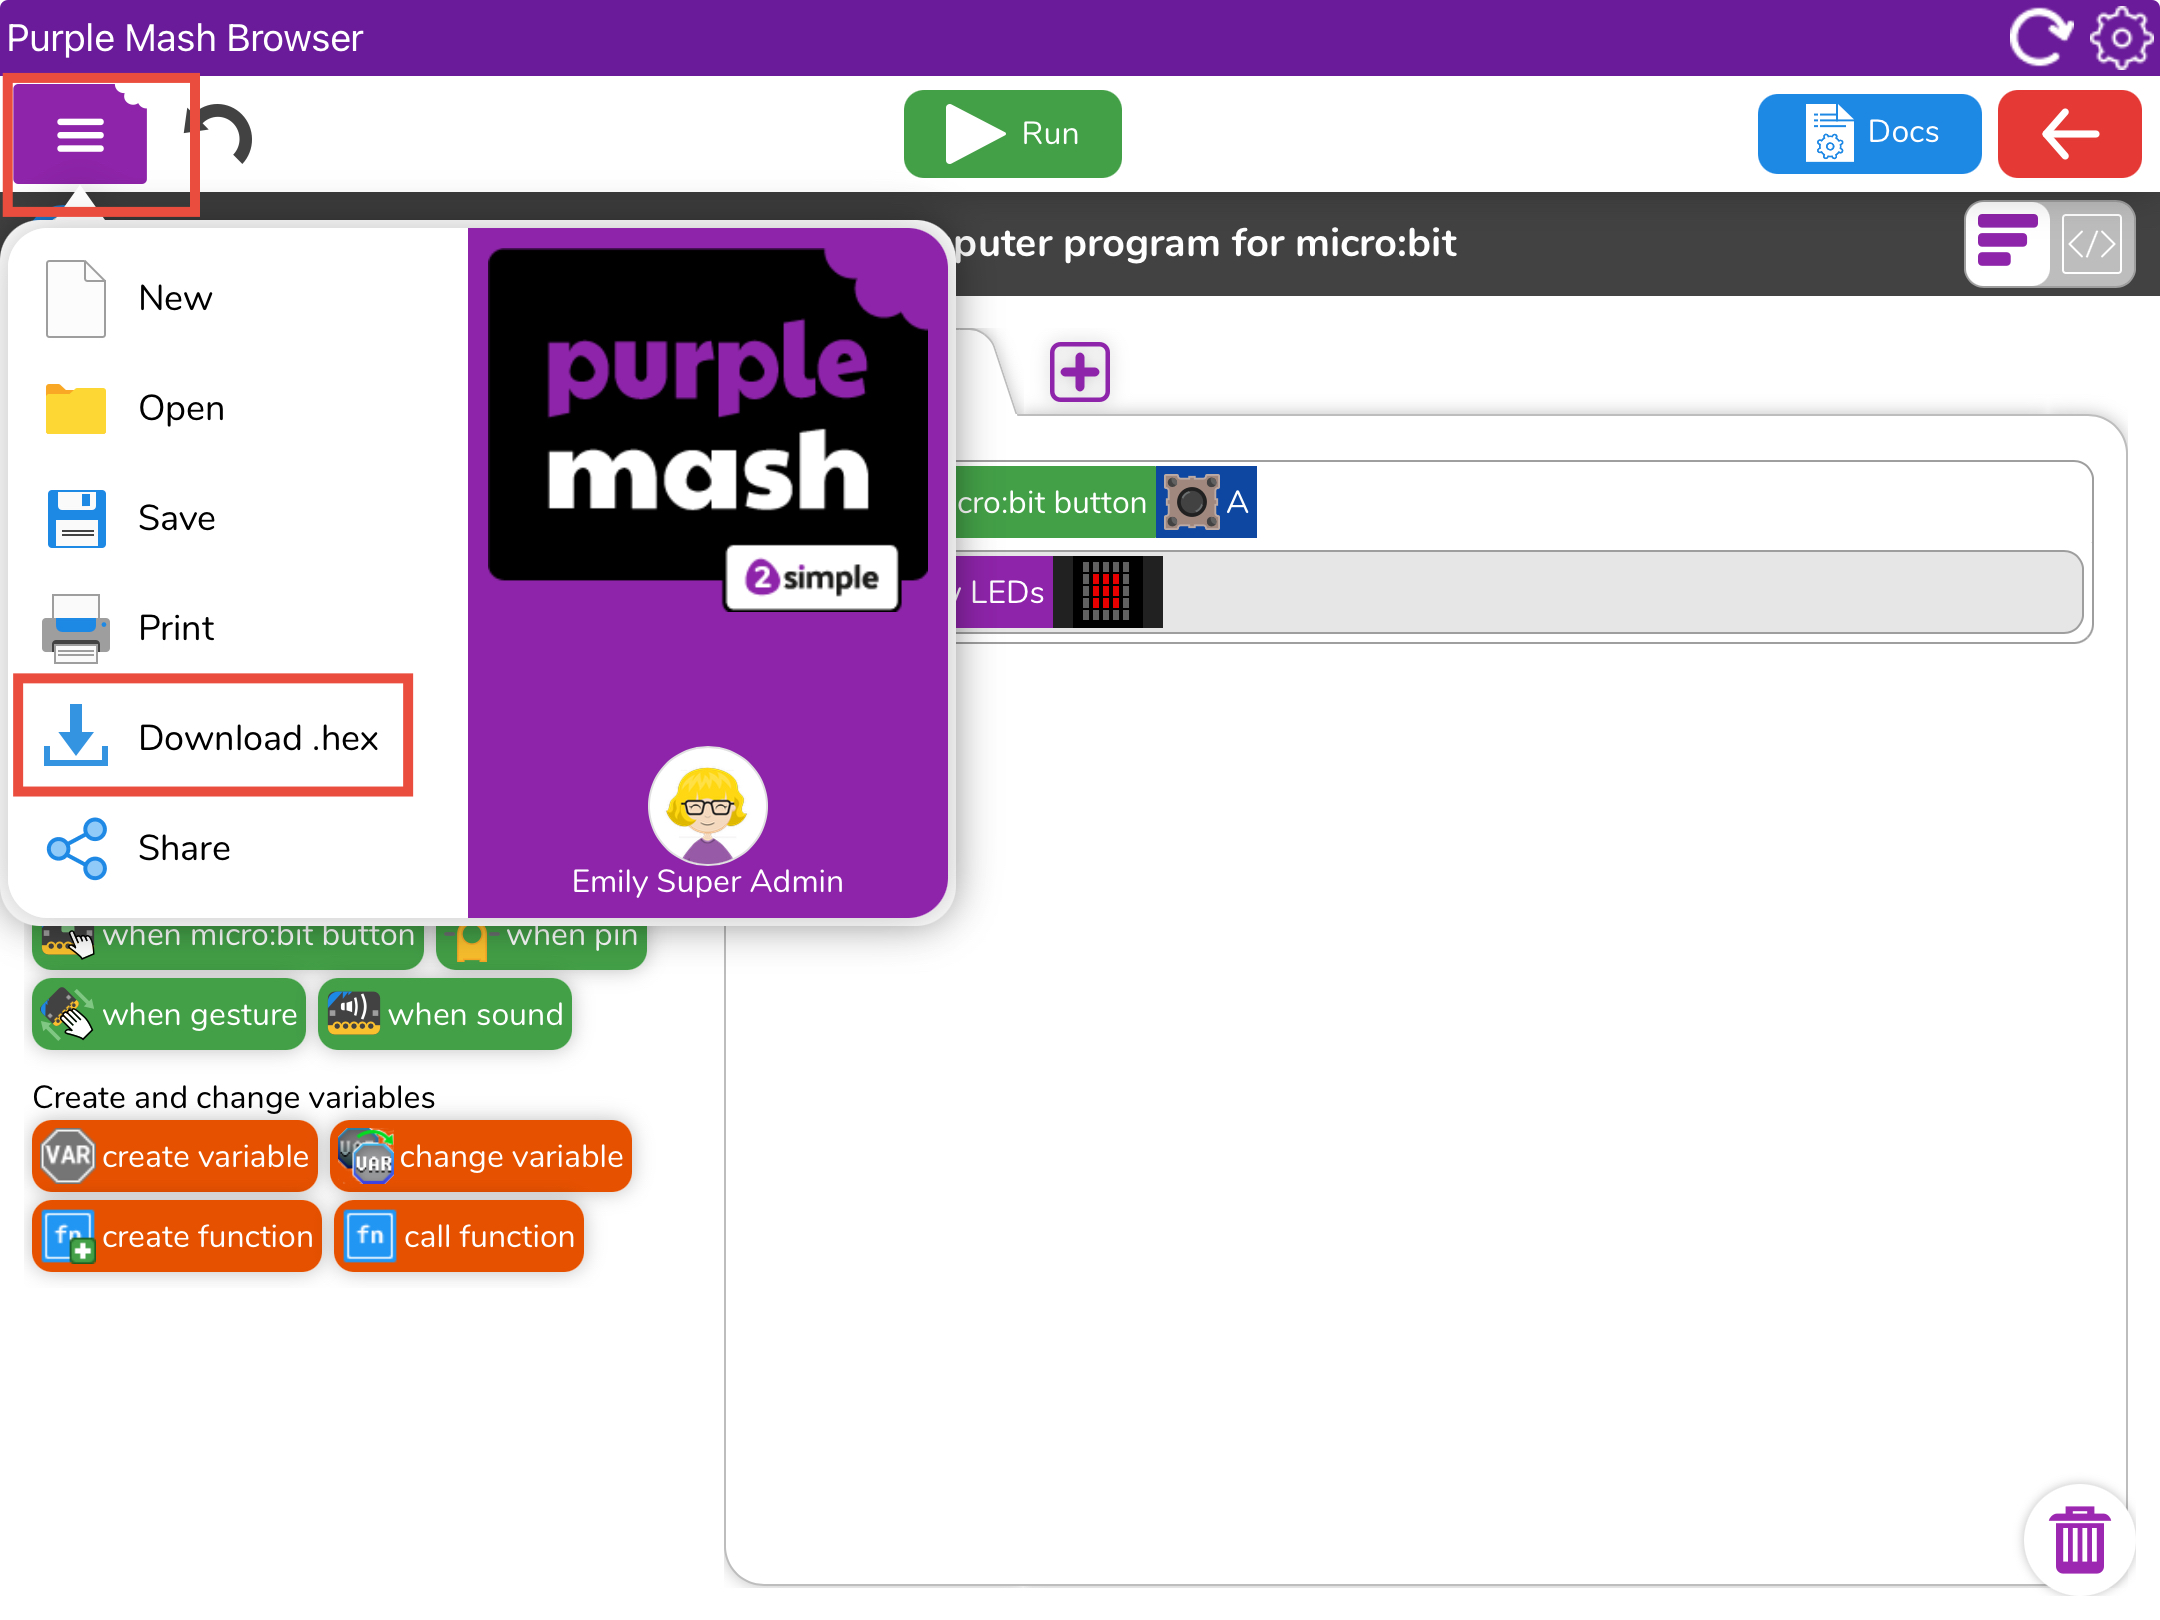
- When you’re ready, open the purple menu button at the top of the page and then tap the Download.Hex button
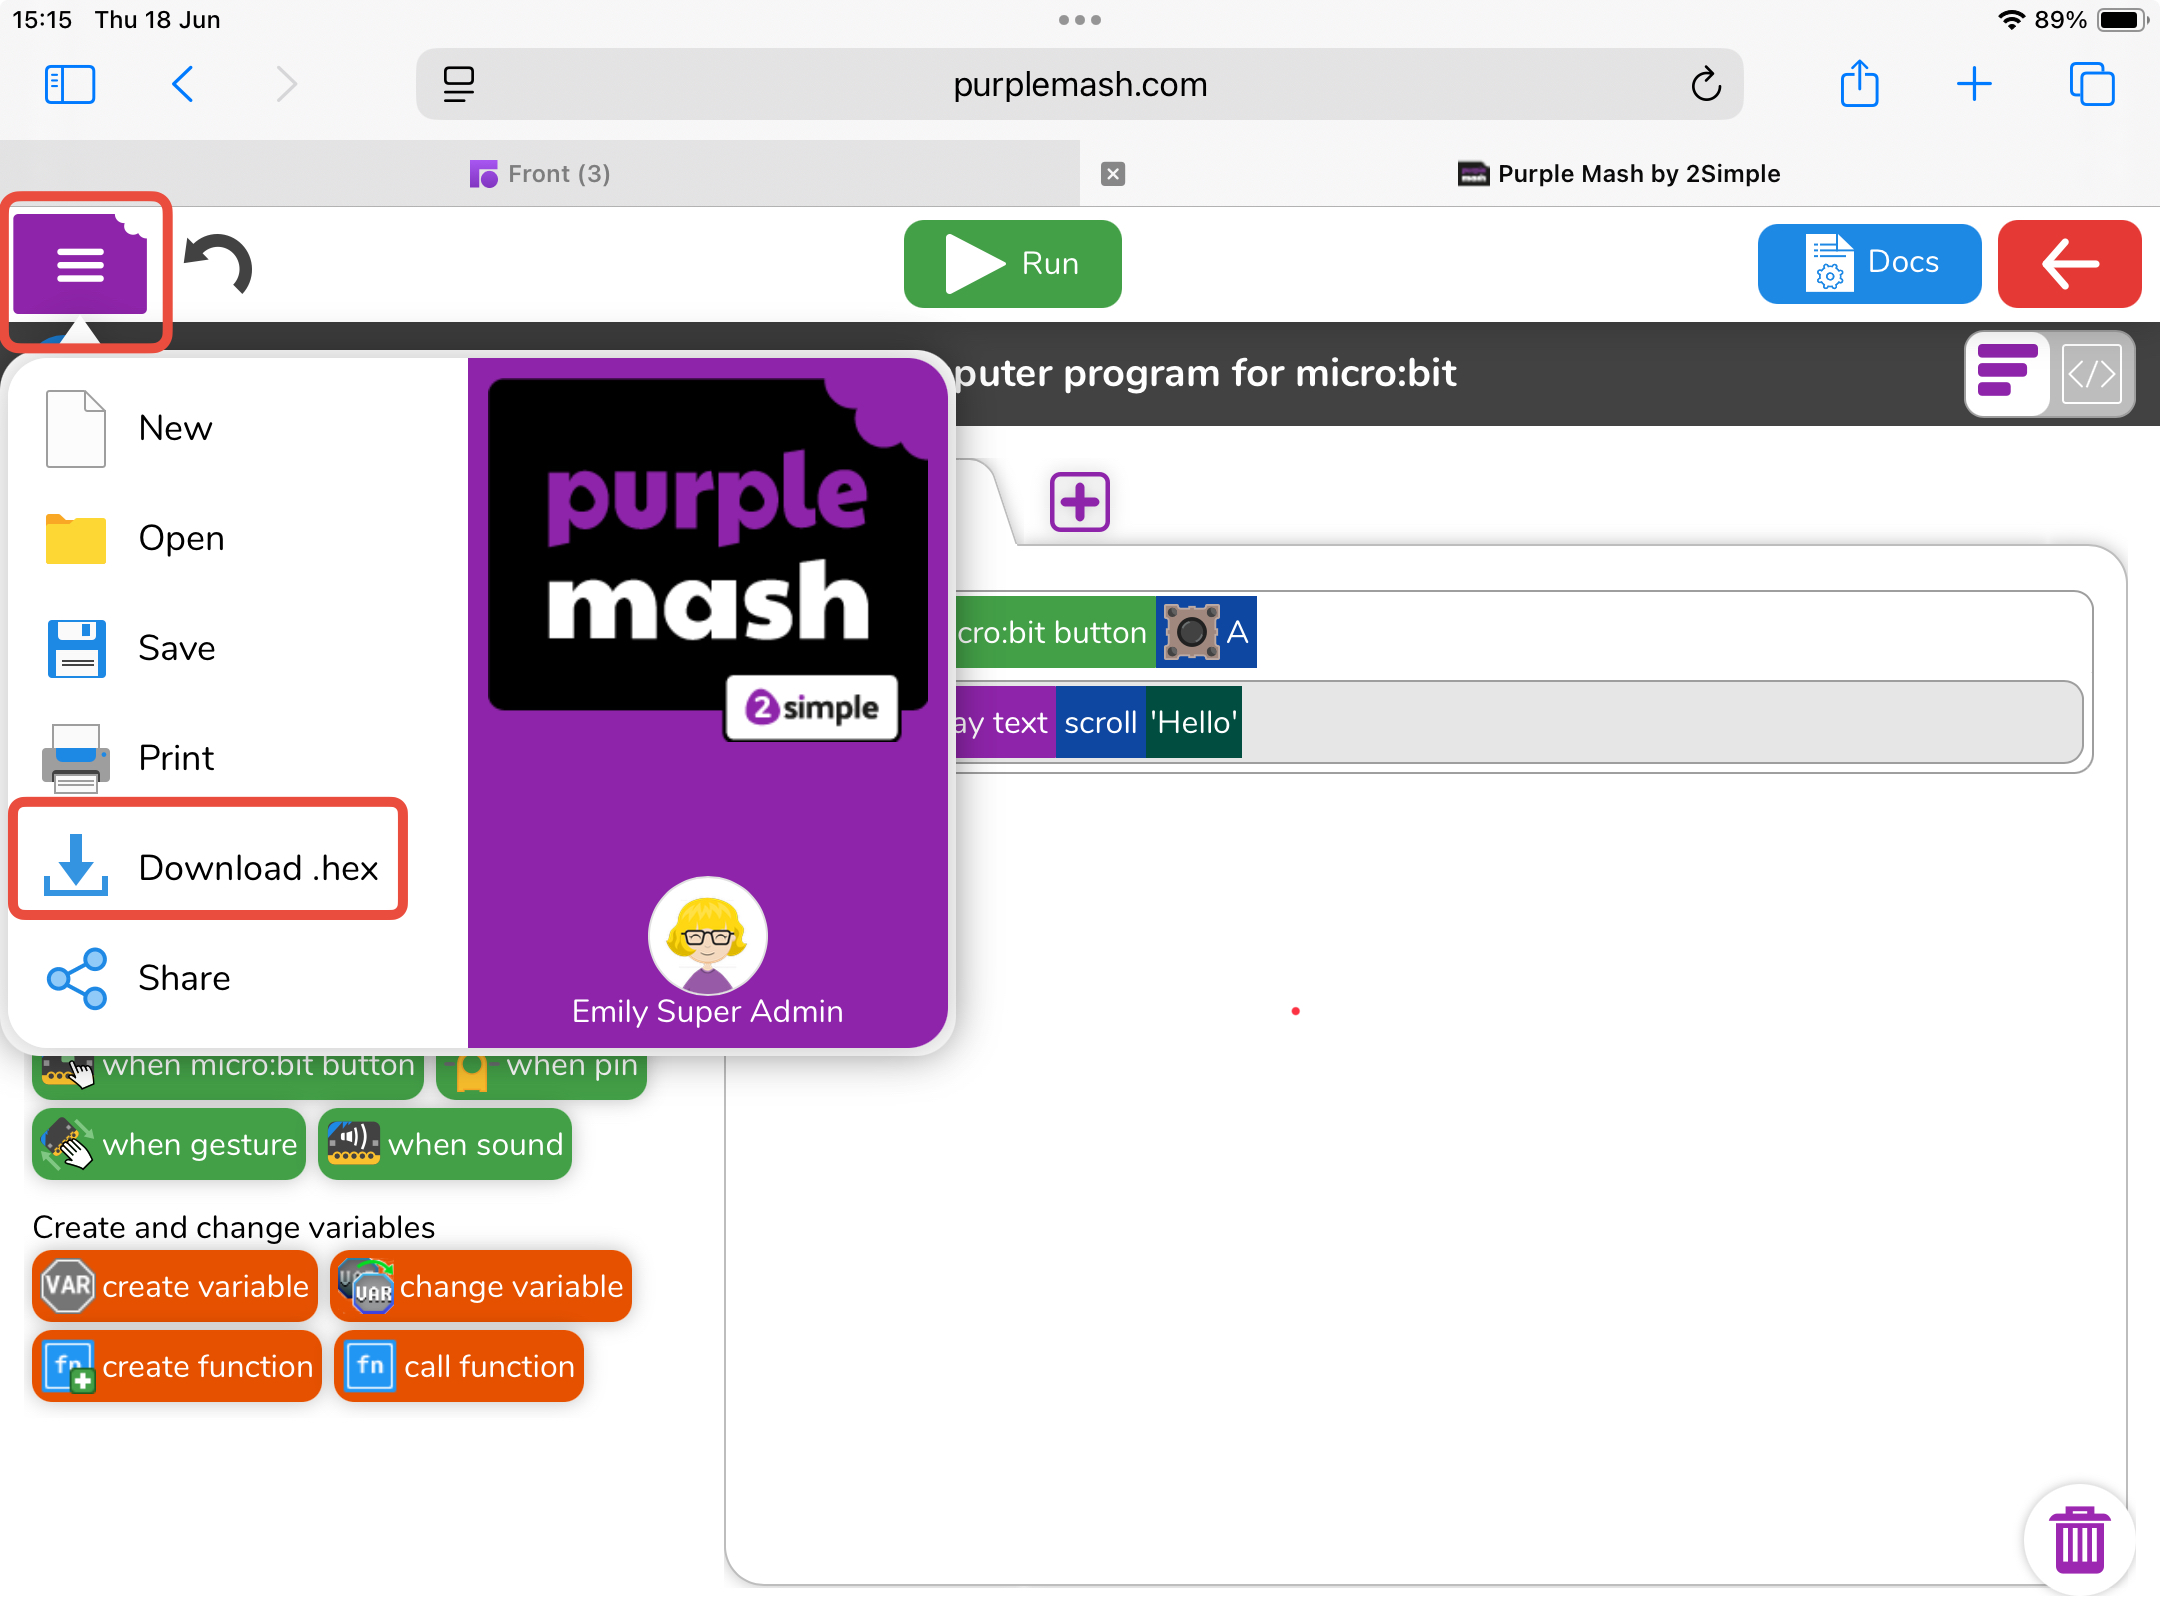
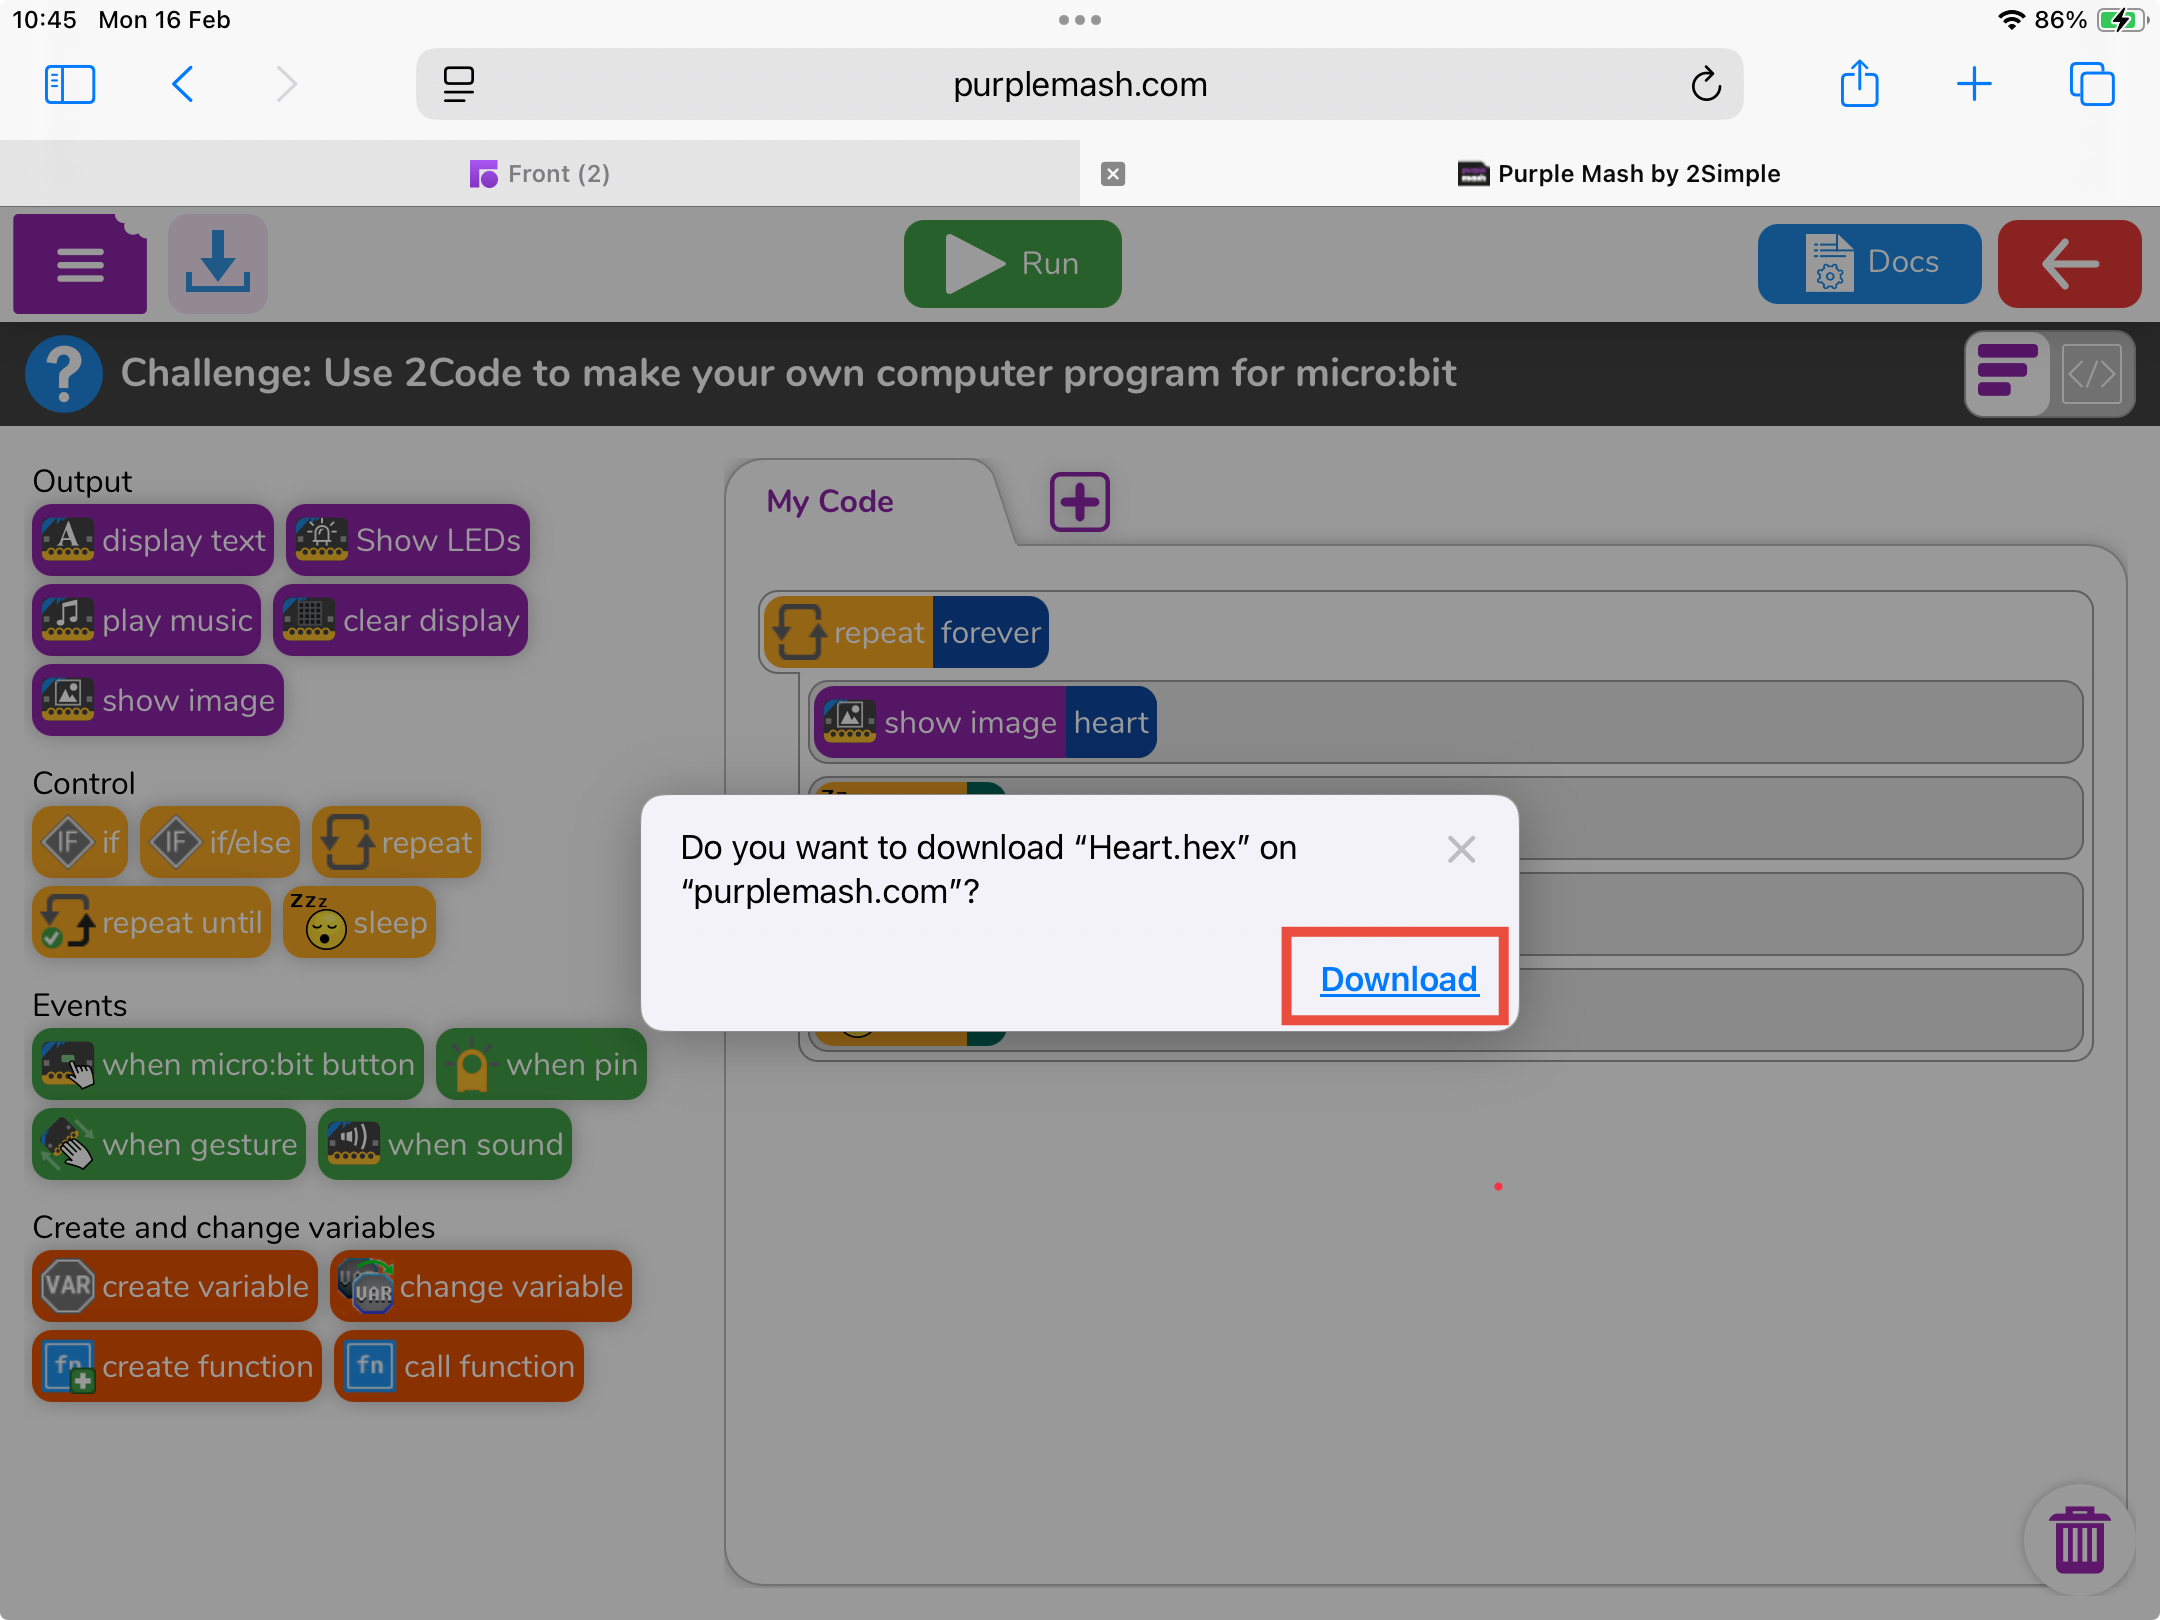
- Select Download when prompted.
Step 3. Open the HEX File
- After downloading, the file will appear in Safari’s download area (top-left corner).
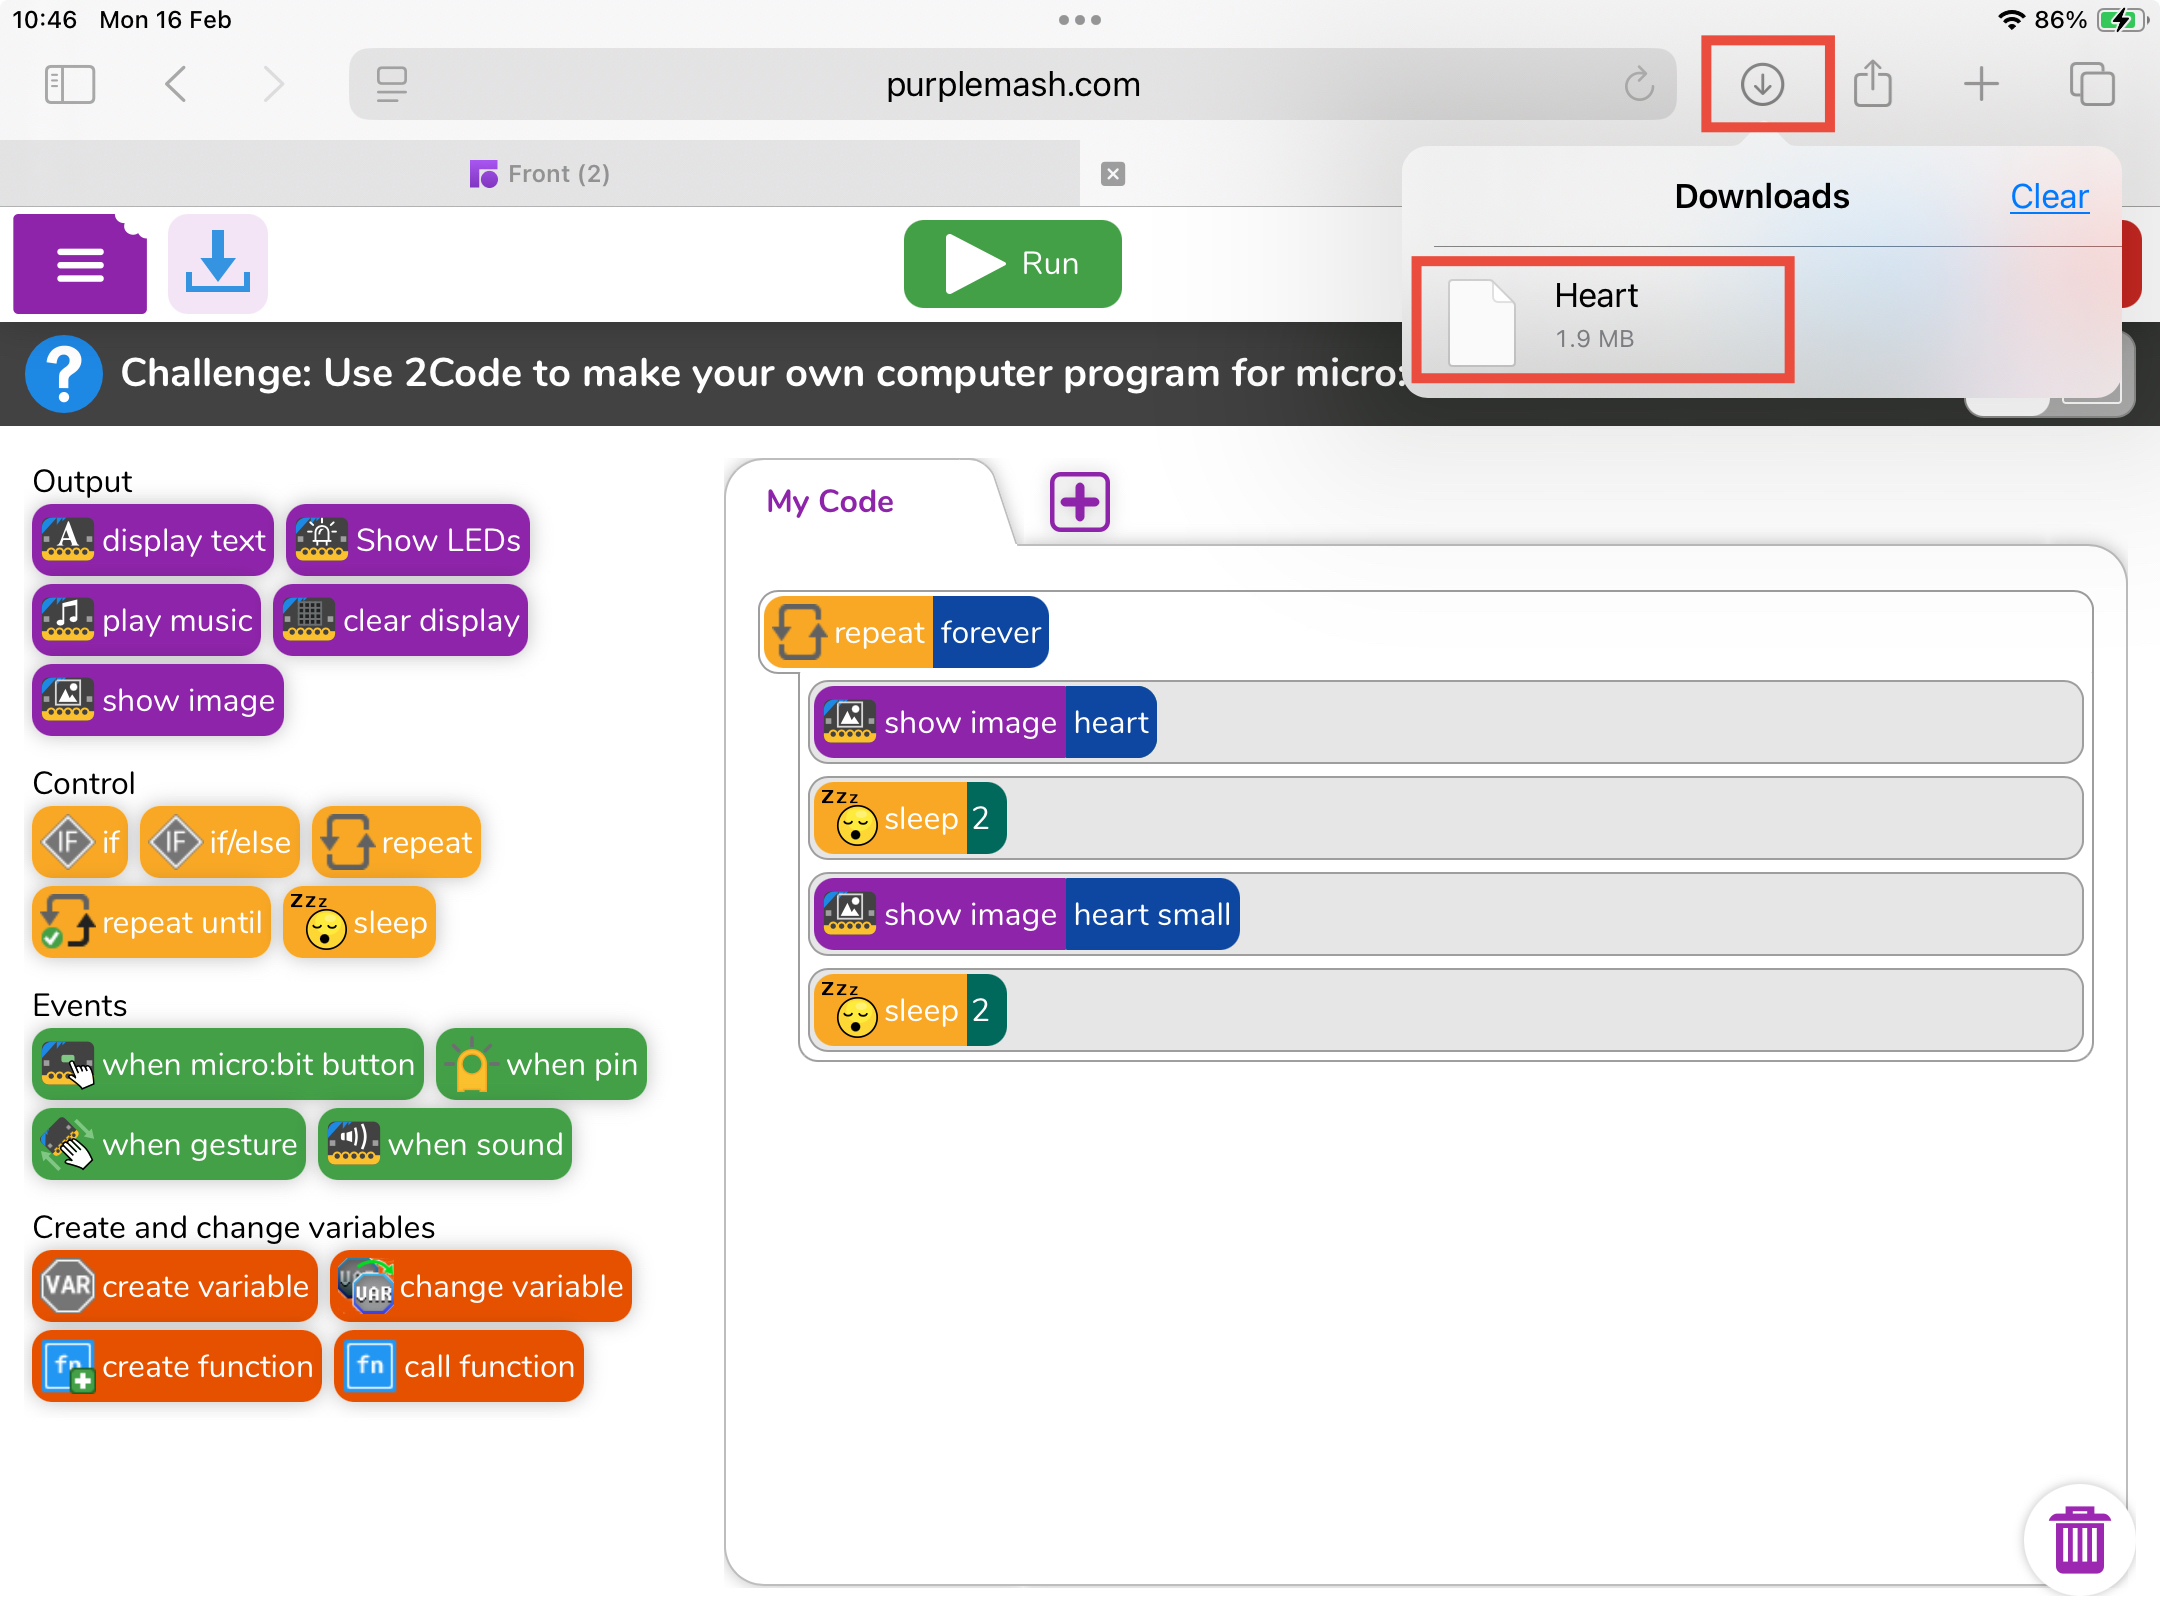
- Tap the file name to open it.
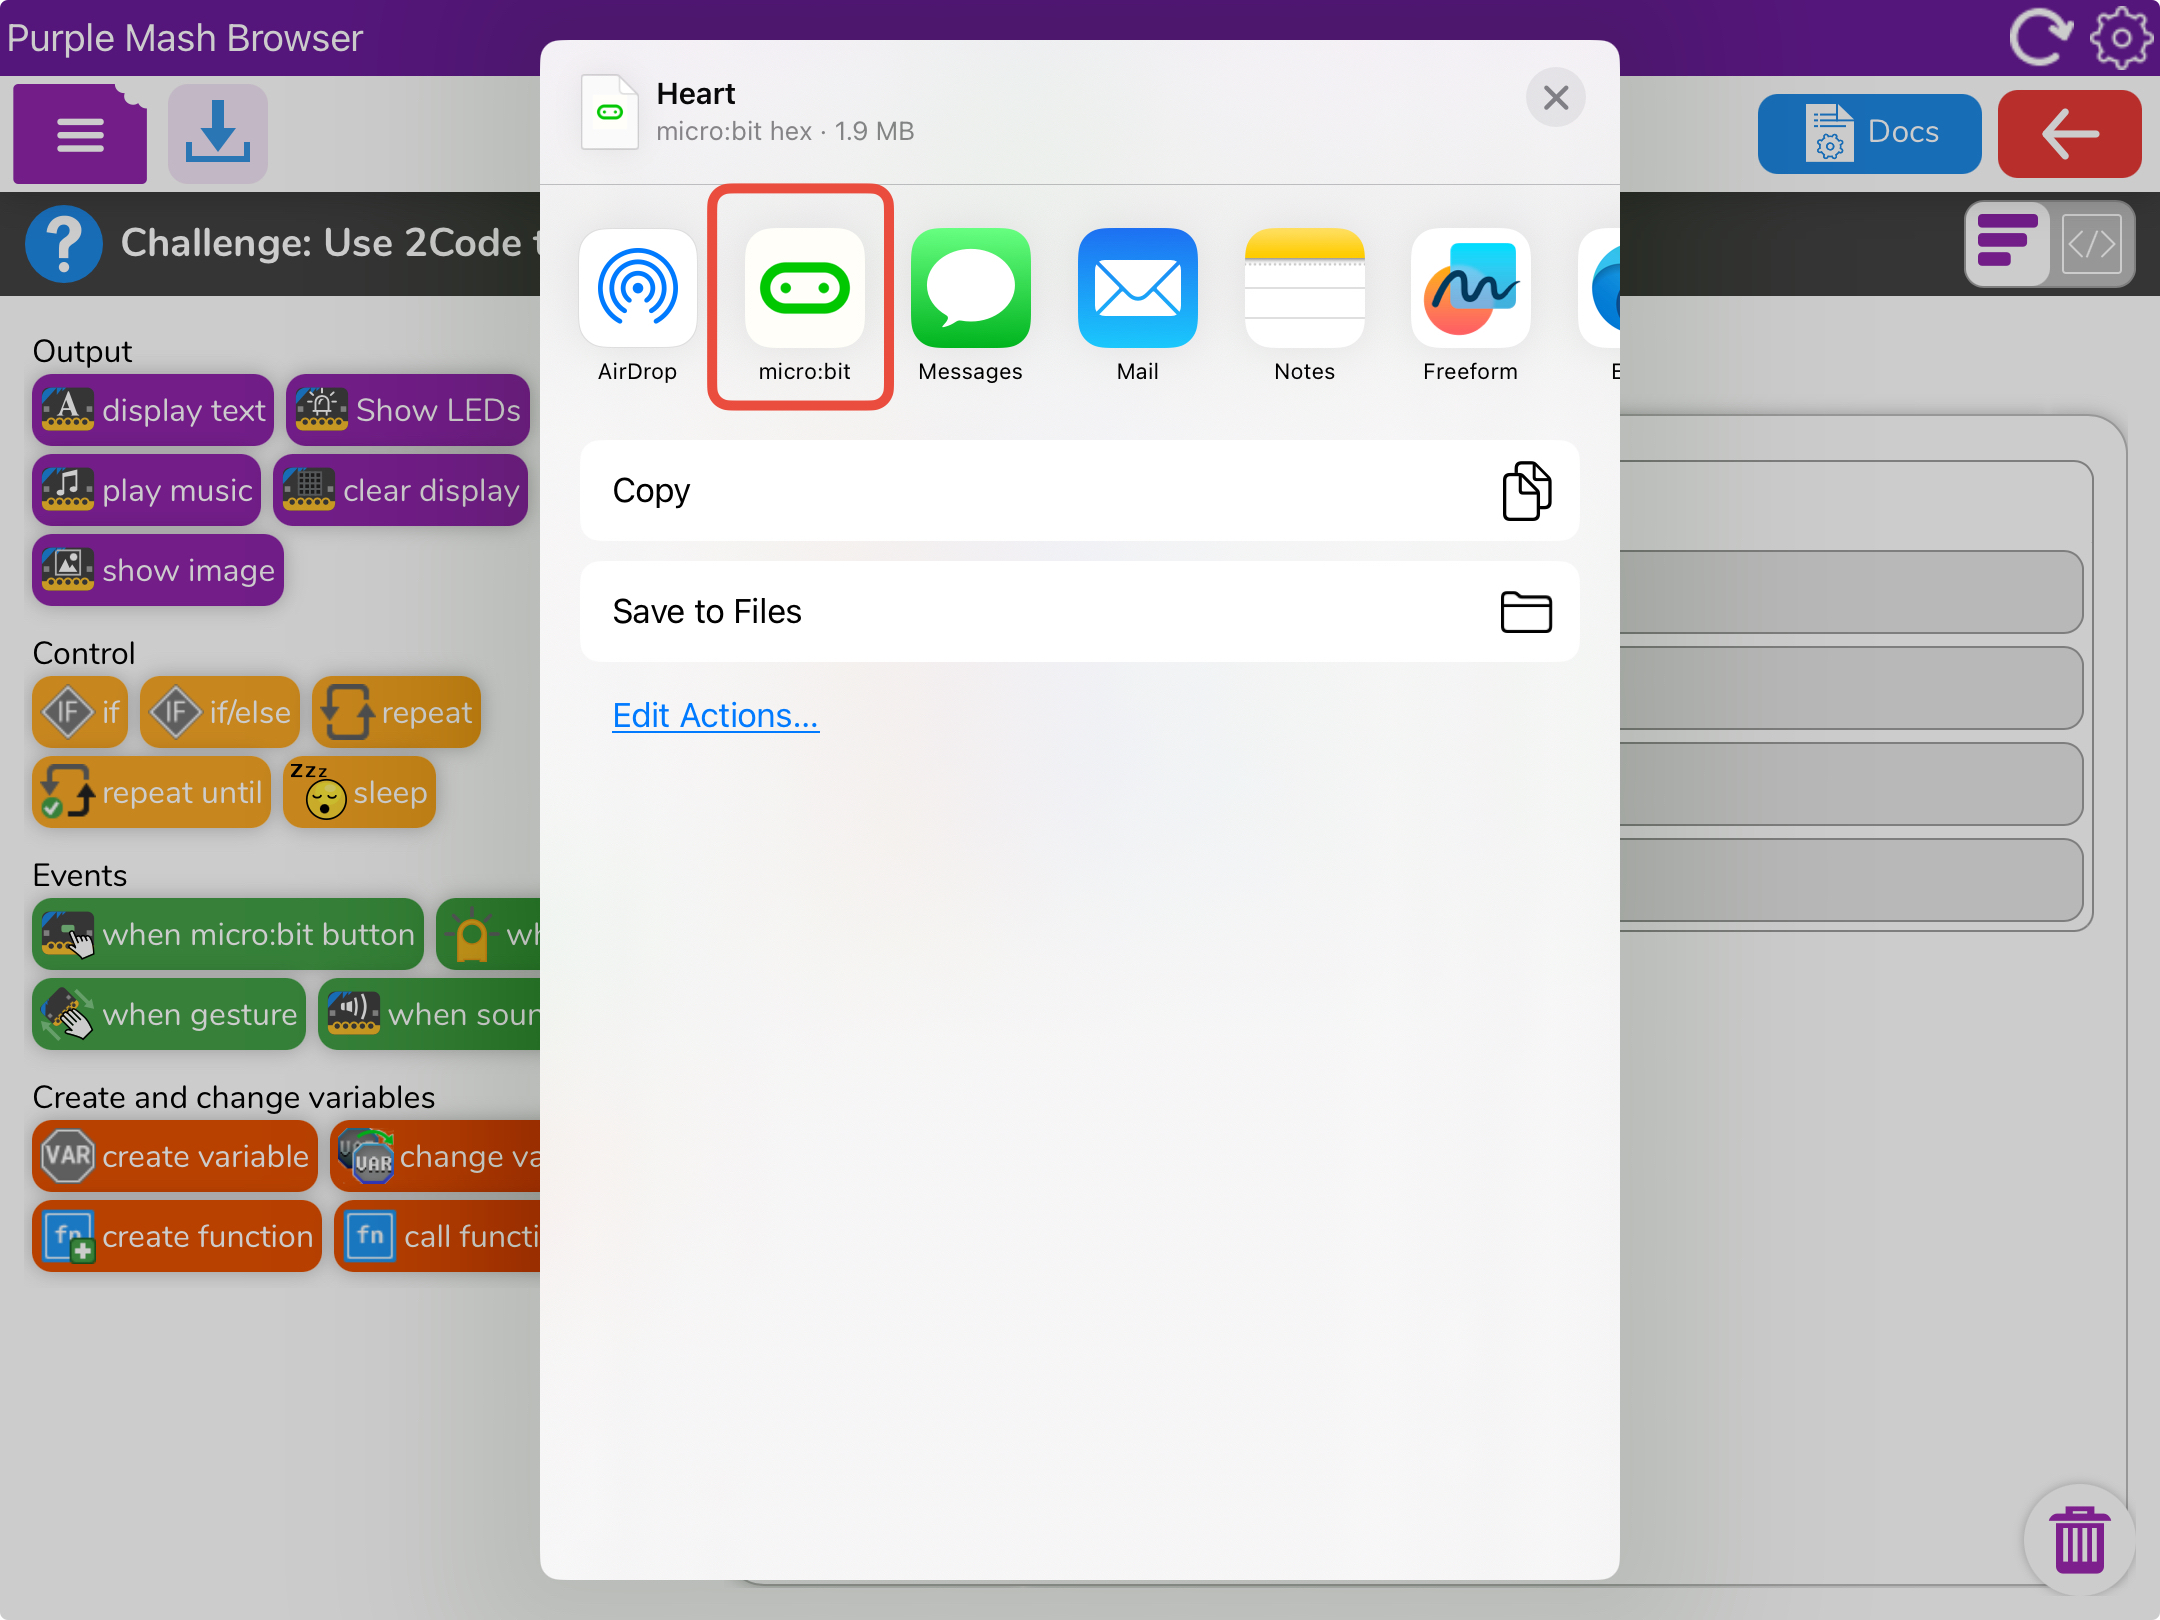
- When prompted, choose Open in micro:bit.
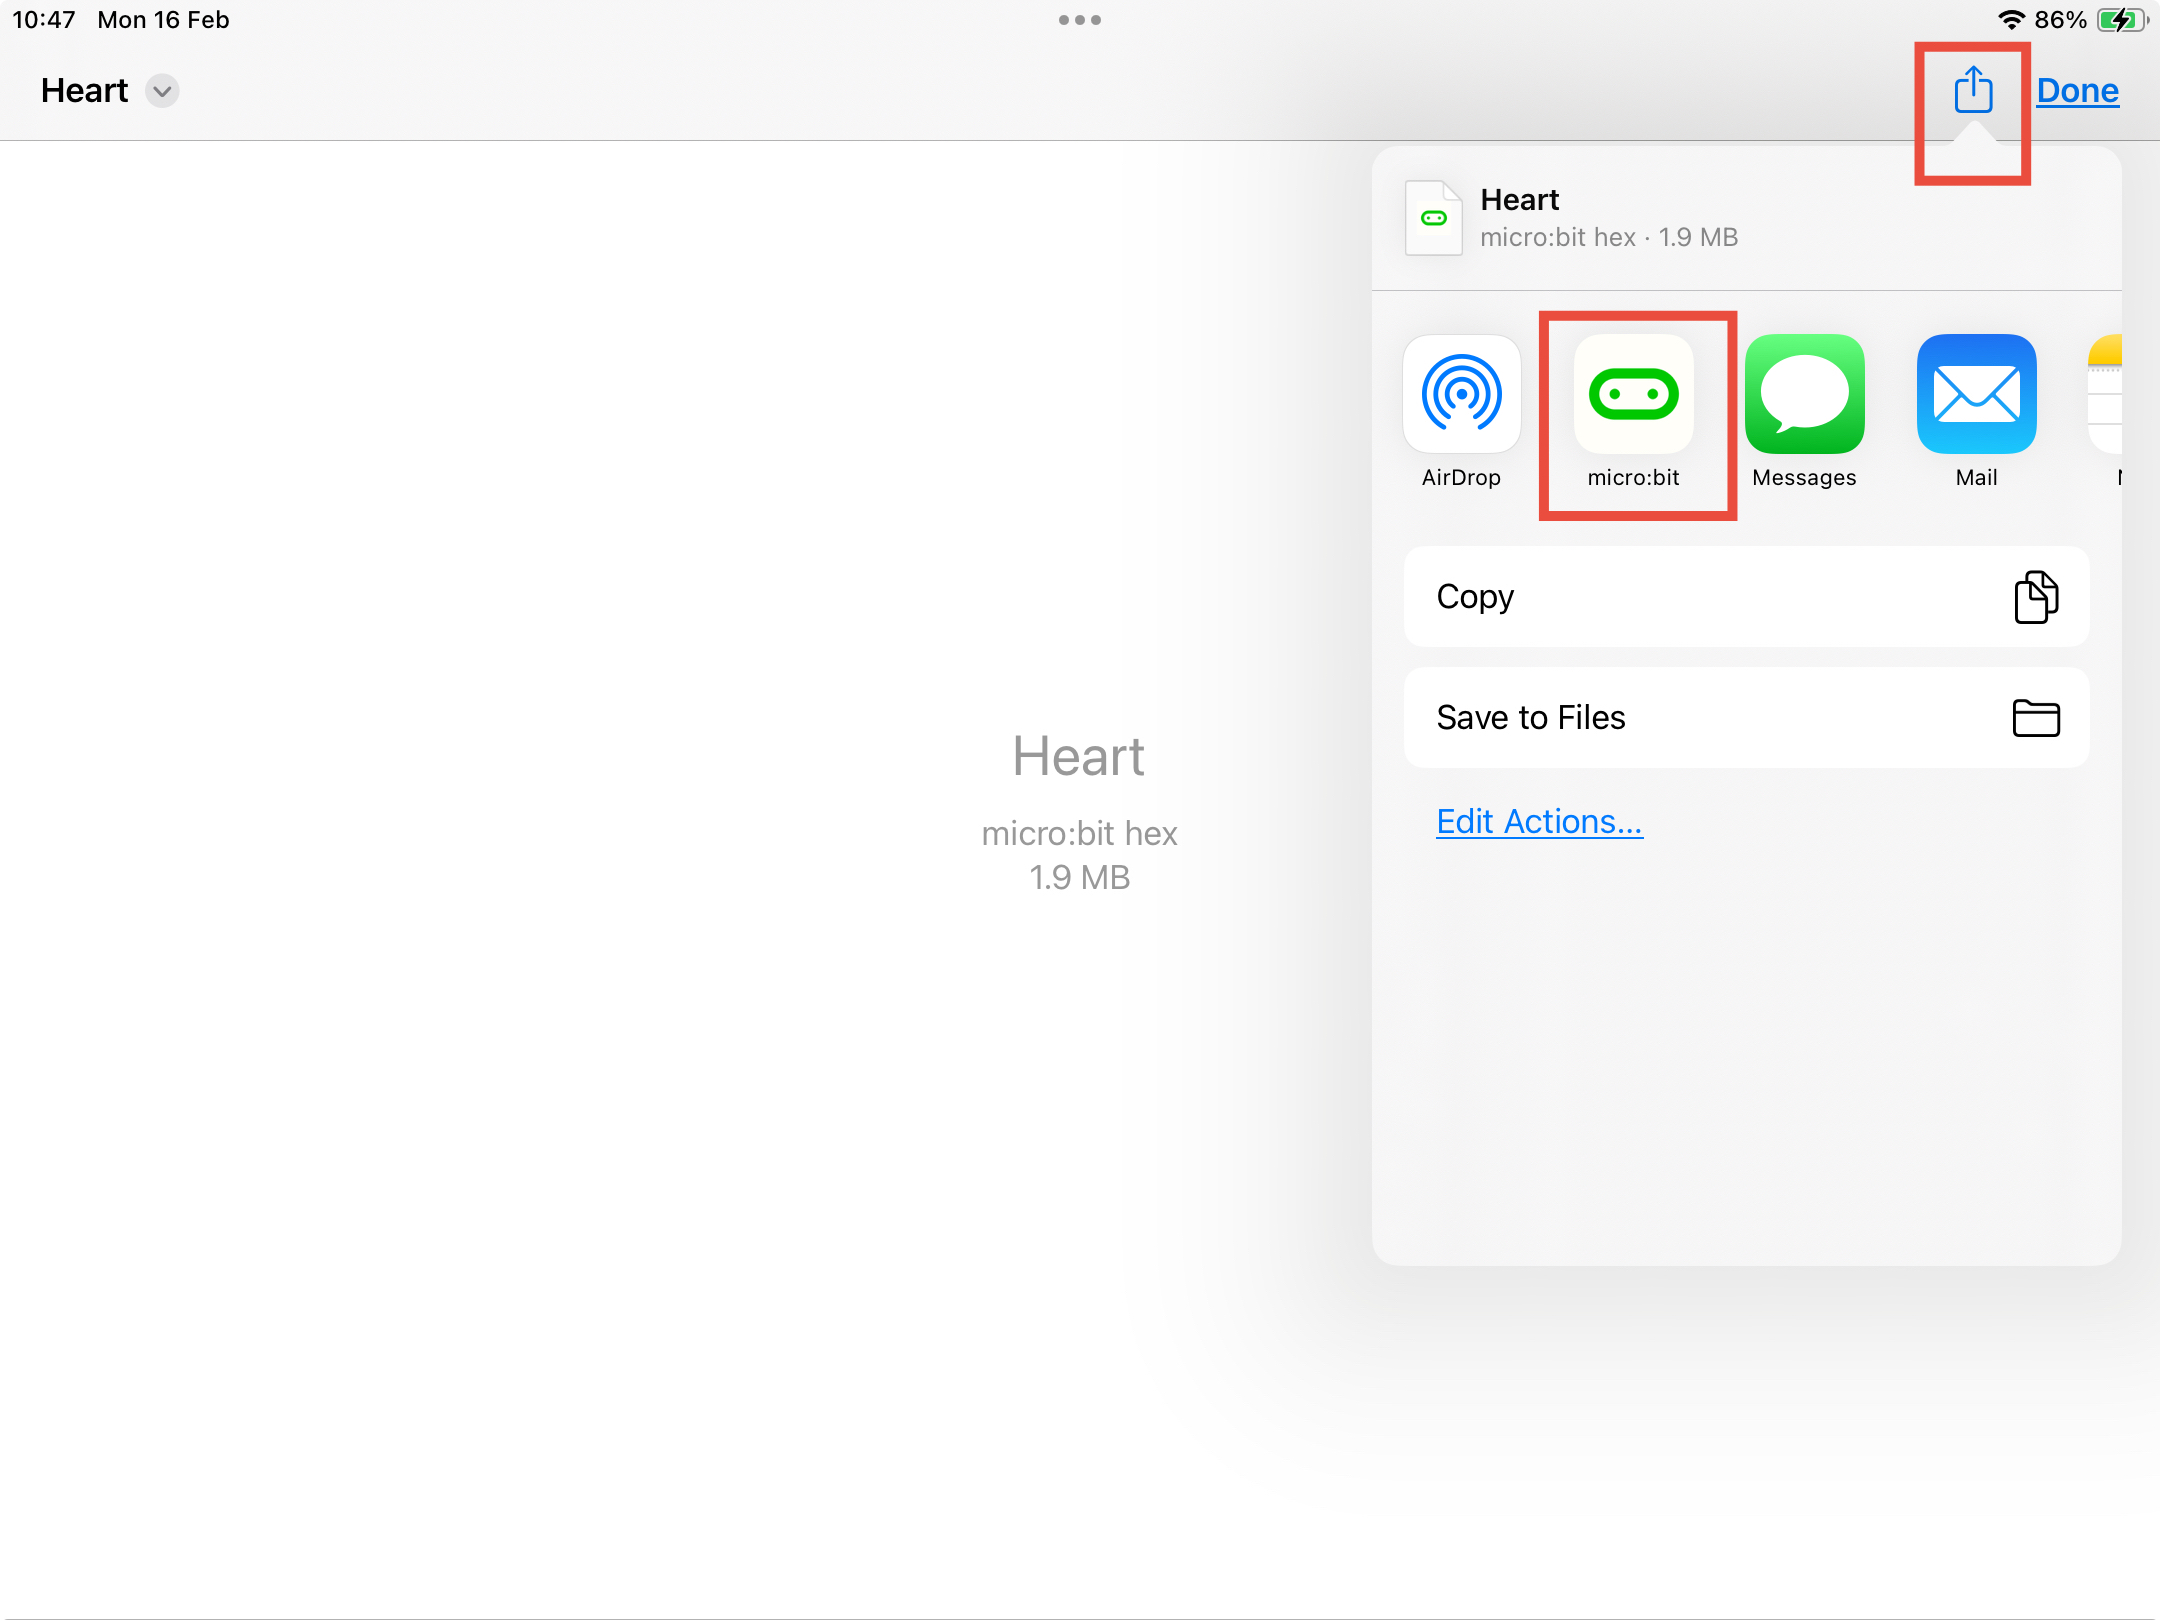
Step 4. Send the Program to Your micro:bit
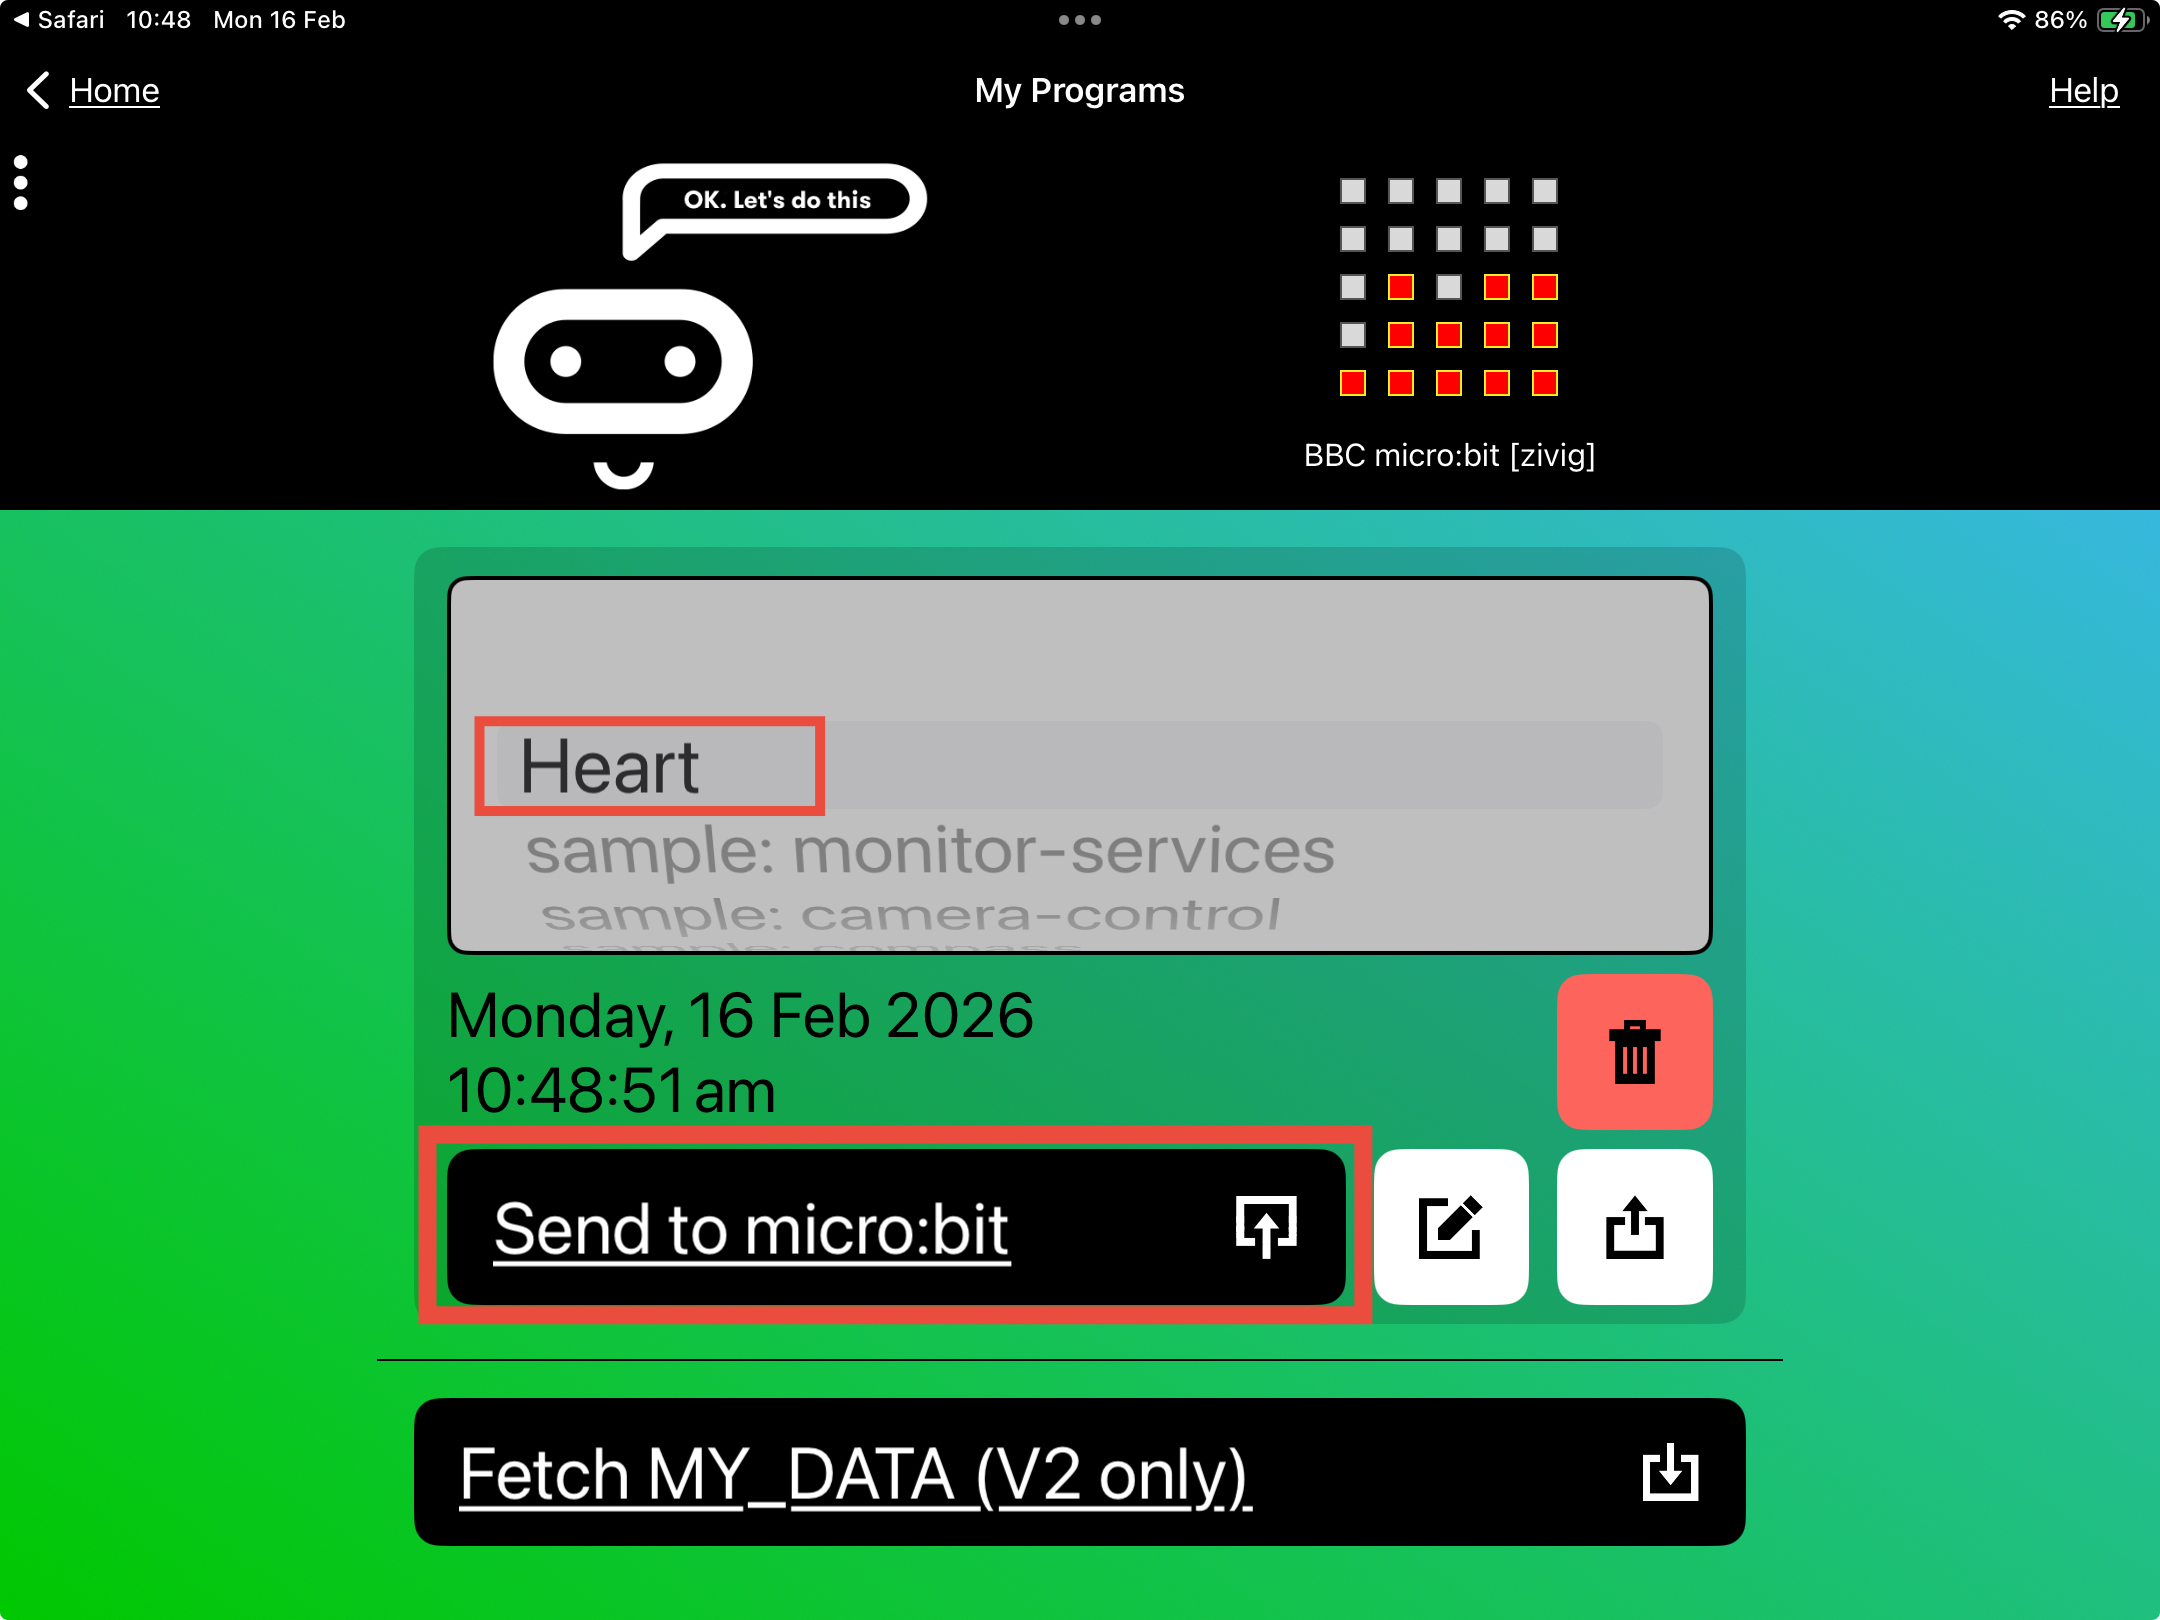
- The micro:bit app will open automatically.
- Your program will appear under My Programs.
- Select the program.
- Tap Send to micro:bit to begin transferring the HEX file.
Using the Purple Mash Browser App
Step 1. Install the micro:bit App
Make sure the micro:bit app for iOS is installed on your iPad before you begin.
Step 2. Create and Download Your HEX File
- Open The Purple Mash Browser App
- Log in to Purple Mash.
- Open 2Code micro:bit and create your program.
- Save your work.
- When you’re ready, open the purple menu button at the top of the page and then tap the Download.Hex button
Step 3. Open the HEX File
- When prompted, choose Open in micro:bit.
Step 4. Send the Program to Your micro:bit
- The micro:bit app will open automatically.
- Your program will appear under My Programs.
- Select the program.
- Tap Send to micro:bit to begin transferring the HEX file.
Need Extra Help?
For a visual walkthrough, watch this video from BBC micro:bit, which explains how to use the micro:bit app to transfer HEX files.